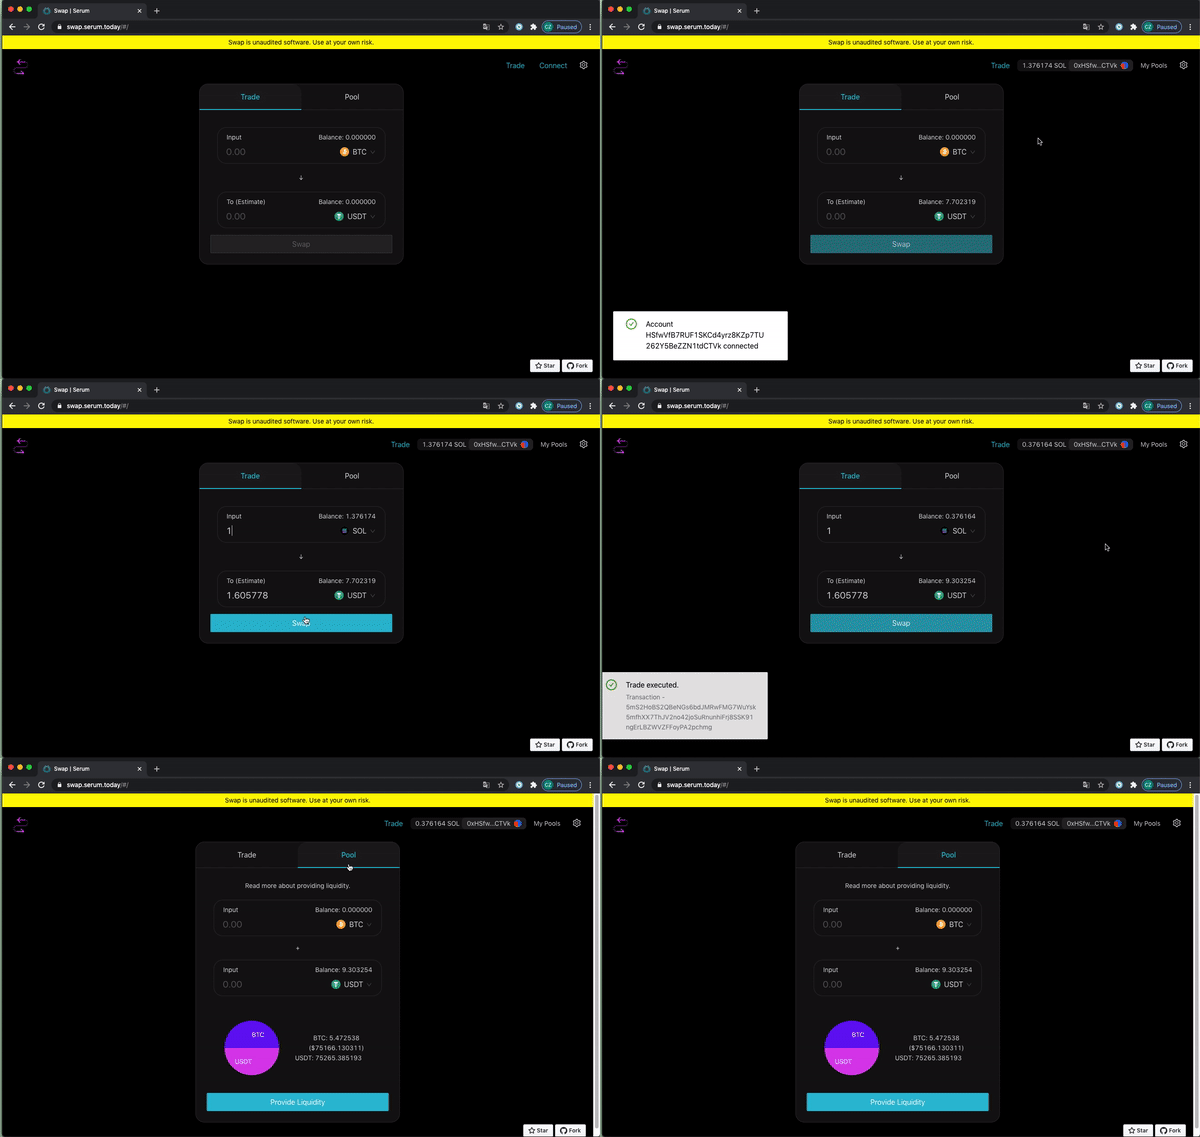
Recently, Serum has released its Swap pool. For now it supports trading by using wallets sollet.io and solflare. Now let’s see how we make the code to support Solong extension.
Let’s see How we use Solong for swap first:

Very easy huh, you do not need to open the wallet and input password every time and keep the wallet window in background neither open separate wallets for different sites.
You can directly try it in our host of Swap which has Solong integrated already. Before using, make sure you have Solong extension added to your chrome and account initiated. You can also find tutorials on using Solong here.
Authorize Account
First, is to authorize our account in Solong, we can use window.solong to check users have Solong installed or not. If existed, you can call selectAccount to pop up Solong asking user’s permission.
solong.selectAccount().then(account) => {
    console.log("connect account with ", account)
}
In order to allow the original codes able to interaction with our extension, here we have created a SolongProvider for providing context.
export function SolongProvider({ children = undefined as any }) {
    //const solong = new SolongHelper();
    const solong = useMemo(() => new SolongHelper(), []);    const [connected, setConnected] = useState(false);
    useEffect(() => {
        console.log('trying to connect');
        solong.onSelected = (pubKey) => {
        console.log('helper on select :', pubKey);
        setConnected(true);
        };
    }, [solong]);
    return (
        <SolongContext.Provider
        value={{
            solong,
            connected,
            wallet: solong,
        }}
        >
        {children}
        </SolongContext.Provider>
    );
}
SolongHelper acts like bridge for communications between Solong and Swap, let’s add selectAccount to our helper:
selectAccount() {
    if (this._onProcess) {
    return
    }
    this._onProcess = true
    console.log('solong helper select account');
    (window as any).solong
    .selectAccount()
    .then((account: any) => {
        this._publicKey = new PublicKey(account);
        console.log('window solong select:', account, 'this:', this);        notify({
        message: `Account ${account} connected`,
        type: 'success',
        });        if (this._onSelected) {
        this._onSelected(account);
        }
    })
    .catch(() => {})
    .finally(()=>{this._onProcess=false});
}
Sign transaction
When we call swap, we need to construct a Transaction and call signTransaction to sign it. So here we call Solong extension to sign it. We add it in helper like:
async signTransaction(transaction: any) {
    return (window as any).solong.signTransaction(transaction);
}
After we call solong’s signTransaction api, it will pop up the extension to ask for user’s signature.
Rejection handling
Other than sollet.io and solflare which using JSON-PRC to return the rejection of sign, Solong will return a Promise rejection, so we can catch it and deal with it:
await wallet.signTransaction(transaction).catch(()=>{
     console.log("User reject the action")
     throw {"error":"User reject the action"}
})
Final words
Overall, it’s very easy to integrate Solong to your Solana Dapp. You can put this solong_helper.tsx in your project and import UseSolong hook from it, then using the wallet from the hook as the way you use sollet.io and solflare.
import { useSolong } from "./solong-helper"const { wallet, connected } = useSolong();
For more example, you can refer to our fork of serum swap here:
So now, take a cup of solong, and happy coding :)
